
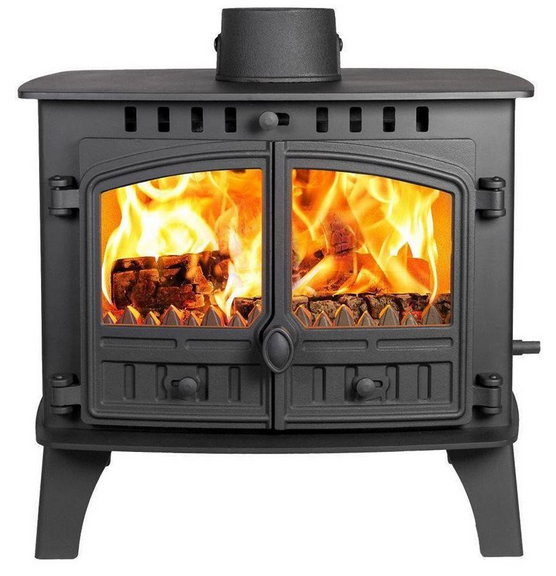
Those who have not yet had the chance to light a wood-burning stove might automatically think it is very easy. Throw in a few logs, the odd fire lighter and hey presto you have a bonfire in seconds. Keep throwing on those big logs and you will create that perfect ambience, that deep seated heat and be able to sit back and relax. In practice it is very different although it is just a case of getting used to what feeds your fire and what starves your fire. So, we will now take a look at the process of lighting a wood-burning stove and the dos and don’ts.
What do you need to light a wood-burning stove?
Surprisingly, the real key (but not the secret ingredient) to lighting a wood-burning stove is the kindling, how you light it, where you position it and ensuring that it is able to light the larger logs. However, there are other elements that you will need with the full list below:-
Firelighters
There are many different types of firelighters you can buy some of which are specifically manufactured for stoves. They are often wood byproducts and do not contain the nasty chemicals that many firelighters burnt in the past. It is also possible to make your own firelighters which may be something as simple as small strips of newspaper. However, to get the right hold, to build up the right heat and get things going, manufactured firelighters work best.
Kindling
As we touched on above, in many ways kindling is the key to the success of your attempts to light a wood-burning stove. As with any wood burned on a stove, the kindling will need to be dry so that it can light relatively quickly and create enough heat to ignite the logs around it. If the kindling is damp it won’t burn properly and it will likely produce black smoke which can have a detrimental impact on your stove. So, keep it dry, relatively small even shaped pieces to give your stove the best chance of catching hold.
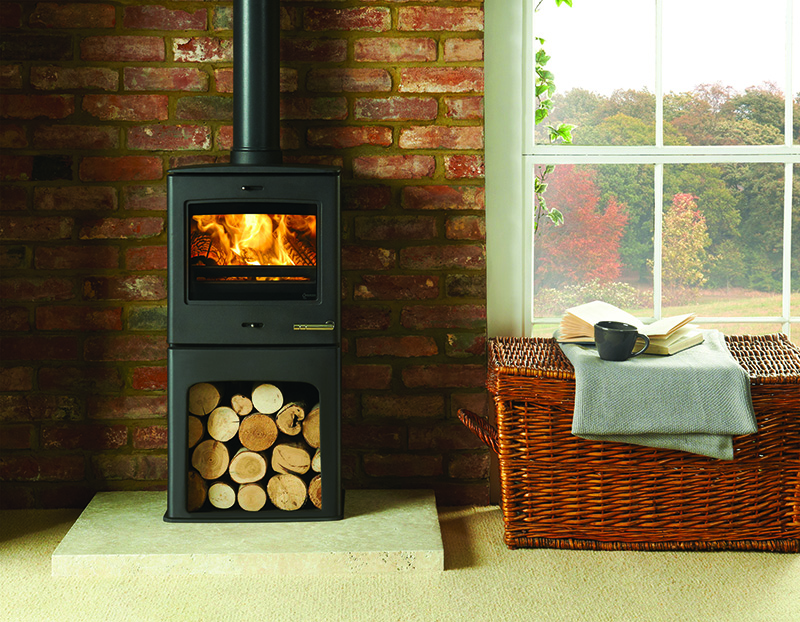
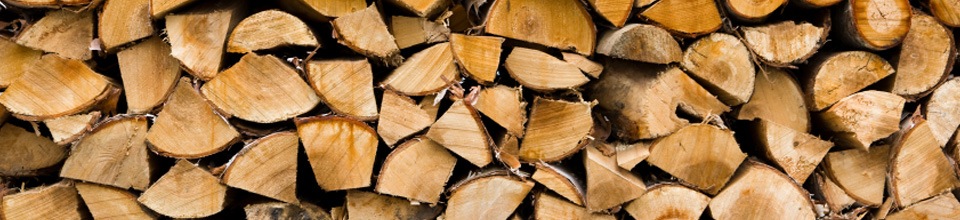
Kiln dried logs
The general consensus is that kiln dried logs need to have a moisture rating of no more than 20% otherwise they will be less efficient and could create potentially damaging tar like material. The best way to think of it is, in order for any wood to burn it needs to be dry. If there is any significant degree of moisture in wood then this will need to be “burnt off” before the wood will burn. This process uses some of the heat created, to dry the wood and then burn it properly when the moisture has evaporated. If the wood is dry at the beginning then the heat energy created in your stove will go towards burning the larger logs.
Lighter
While there are many fancy pieces of equipment you can use to light your wood-burning stove, good old-fashioned matches or a lighter will work just as well as anything else. However, until you master the art of lighting your wood-burning stove you may singe the hairs on your hands before you get the positioning right! It will come with time, but you do need to be careful!
How to start and continually refuel your fire
First thing to remember when lighting any fire is that no matter what fuel you use, the main fuel is oxygen (in this instance air). If you starve a fire of air then it will very quickly burn out and you will have to start the process all over again. So, we will now take a look at the various steps to building the perfect fire and how to maintain that heat.
Air vents
Before you even begin building your fire you need to ensure that all of the air vents are fully open and in the early stages you also need to keep the stove door open. This ensures there is more than enough fuel for the fire, the air that we breathe is vital. There will be a time and a place to control the airflow but initially it is quite literally as much air as possible.
Building a mini bonfire
The best way to describe the initial structure of your fire is like a mini bonfire made of kindling with a couple of firelighters to kickstart everything. Many people build the kindling in a pyramid-like structure with the firelighters at the bottom. As we know, flames reach upwards so as the kindling is set alight at the bottom, this will very quickly spread. During this stage it is important that there is sufficient space between each piece of kindling to let the airflow through the air vents and the stove door. The more “fuel for the fire” the quicker the kindling will catch hold, which will then begin the burning process of the larger logs.
So, once you have structured your pyramid with the firelighters, light the firelighters and watch the kindling catch hold.
Managing the early flames
Once you have lit the firelighters and you begin to see the kindling take hold, you can partially close the stove door but ensure that the air vents are still open. If the door was closed with the air vents fully open this would not create sufficient airflow, required to move onto the next stage. So, while it may seem a small point to leave the stove door slightly ajar it does play a role. In the interests of safety it is advisable not to leave the room during this process as sometimes the kindling will spark and small elements could spit out.
Adding larger logs
Once the kindling has caught hold it is time to gently add two or three medium/larger logs across the flames. Again, it is important to ensure there is space between each of the logs so this not only allows air to flow but also ensure that the kindling fire is not smothered. During this process you can close the stove door as there should be sufficient strength with the kindling fire to spark the larger logs on reduced air flow. You will be able to watch the fire building up and the logs start to burn through your stove glass window. This can take some time, depending upon the size and moisture levels in the medium/larger logs although you should fairly quickly begin to see signs that the fire is catching hold.
Nurturing the fire
Once you have added the larger logs onto the kindling bed of flames you can then close the stove door. The air flowing through the air vents should be enough to maintain the fire. In the early days of lighting your stove you will need as much air as possible to “get it started”. However, once the larger logs have begun to burn you will then need to control the airflow by not only closing the stove door but adjusting the air vents. The degree to which you should close the air vents will be covered in the manufacturer’s guide, which you should follow at all times.
The best way to describe this is when humans have large meals we only need to follow this up with snacks to “top-up” our energy levels. It is the same for airflow; a big burst of air at the start to get the fire started and then significantly reduced airflow to keep the fire burning. This ensures significant heat is created within the stove and you are able to extract as much energy as possible out of each log.
Relighting your fire
These are the main stages when lighting your wood-burning stove although on occasion you will no doubt see your kindling pyramid burnout before the larger logs have started to burn. This is where you need to be very careful because even if the kindling fire was only on for a short period of time there could still be significant heat retained within your stove. The outer surface may be hot, the inner surface will be hot and even though the kindling ashes may look to have extinguished, even ash can create significant heat.
So, it is advisable to use stove gloves and never put your full hand into a stove unless it is stone cold. If your fire does burnout, place the larger logs to one side (if they have been partially burning) within the stove, add more kindling, a fire lighter if required and start again. You will very quickly realise the level of air required to feed the early stages of the lighting process. There is no better feeling once your stove is burning brightly.
Never use combustible liquid
Believe it or not, even though the dangers are there for all to see, some people do still use combustible liquid such as petrol as a secondary ingredient when lighting their stoves. While not necessarily visible to the naked eye, when you pour petrol or similar liquids onto a fire these create vapours which can hang around in the atmosphere. The fire can very quickly ignite petrol and the vapours left behind, sometimes leading to horrific burns for those holding the liquid container.
If you use petrol as the initial combustible material when starting your fire this can also be extremely dangerous – it will ignite immediately. This could ignite vapours in the atmosphere and if you have your hand inside the stove you risk severe burns. So, stick to good old-fashioned kindling and safe firelighters to slowly build up the flames and that deep seated heat which will start to radiate over time.
Summary
The process of lighting a wood-burning stove may seem onerous and time-consuming but it is well worth the wait. The process described above is not only the safest but it also ensures maximum efficiency and heat output from your wood fuel. Whatever type of machine you have it is vital that you refer to the manufacturer’s guide. There will be specific instructions on how to adjust the air vents during the various stages of lighting your machine.
Once your stove has been lit it is simply a case of adding new logs to replenish the fire as the old logs begin to burn out. You must obviously be careful when opening the stove door and laying the new logs on the burning fire. Yes, we know this safety talk is common sense but you would be surprised……